Skip to content
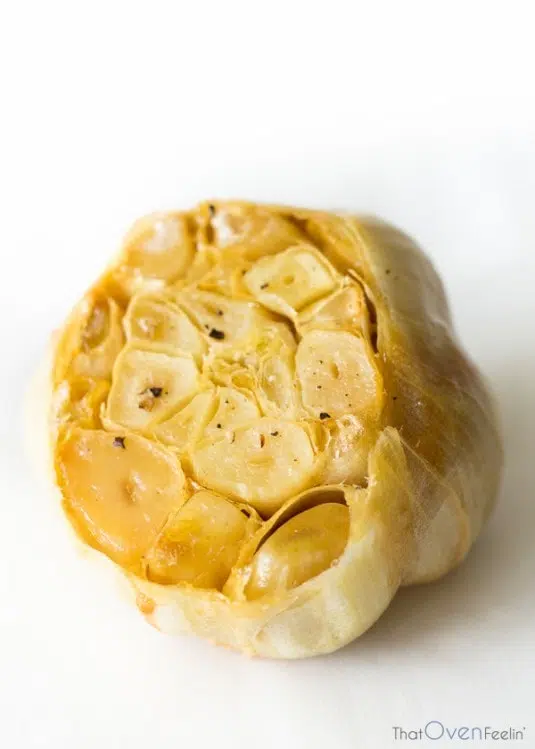
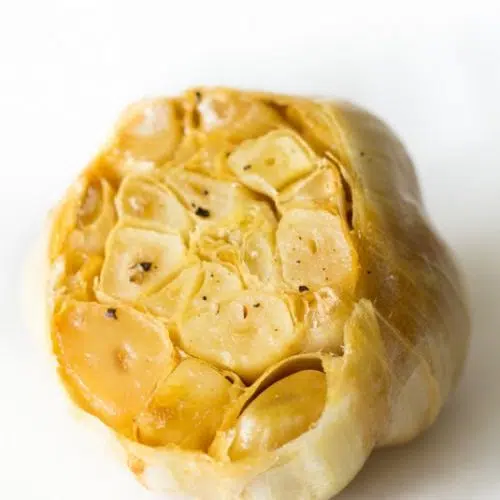
Roasted garlic is one of my favorite ingredients that really elevates the flavors of a dish. While raw garlic has an astringent taste, roasted garlic is creamy and much sweeter. It’s a great addition to soups, salad dressing, dips, mashed potatoes, or as a spread for toast. These golden little nuggets are so good that you can even pop them out and eat them by themselves.
Unless you already have roasted garlic on hand, it takes upwards of 40 minutes to roast a bulb of garlic. If you’re like me, I always forget to start roasting the garlic before preparing a dish, then resort to using raw garlic. However, roasting garlic in bulk and freezing it means that you can add this super-creamy ingredient to any dish, without having to wait 40+ minutes for the cloves to soften.
I usually roast between 6 and a dozen bulbs of garlic at once. However, I’ve started noticing that I’m getting some funny looks when I buy a gigantic bag of garlic from the grocery store.
With that much garlic, they probably think I’m trying to ward off vampires.
To keep the garlic cloves upright, I’ll ordinarily roast the bulbs in a muffin tin that is covered tightly with foil. However, these garlic bulbs were GINORMOUS. I couldn’t get a single one to fit in the muffin tin, so I just grabbed a rimmed baking sheet instead. After drizzling the bulbs with oil, I covered the entire baking sheet with a few sheets of aluminum foil instead of individually wrapping each bulb. It also makes it much easier to test the doneness of a large batch of garlic if they aren’t individually wrapped.
If you are roasting a single garlic bulb, you can either wrap the bulb in foil or place it into an oven-safe ramekin and cover with foil. It makes clean-up a breeze. Better yet, toss a few of those individually wrapped bulbs into the oven while you’re baking a casserole. It’s one of my favorite ways to add to my roasted garlic reserves.
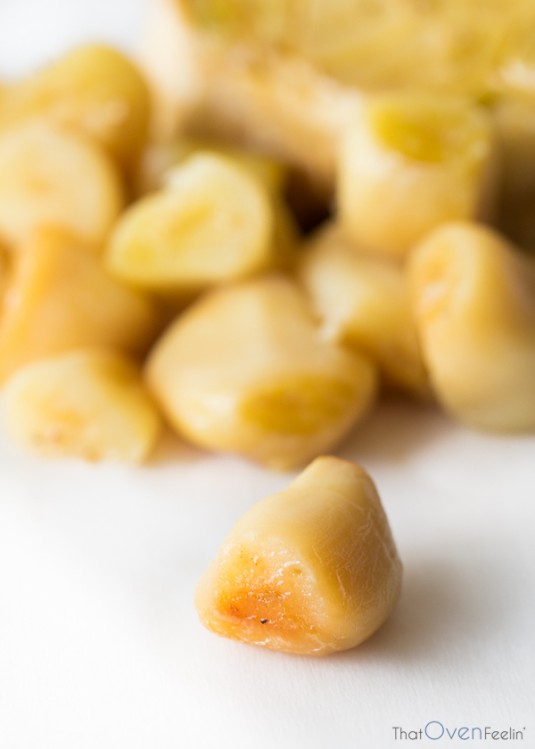
After the cloves have finished roasting and are a beautiful golden color, you can freeze the cloves whole or mash them into a paste and freeze in an ice cube tray. Either way, you’ll always have perfectly roasted garlic at the tip of your fingers.
Super-Creamy Roasted Garlic (And How To Freeze It!)
Ingredients
- 6 bulbs of garlic
- 3-4 tbsp olive oil
- salt and pepper, to taste
Instructions
- Preheat the oven to 375 degrees Fahrenheit.
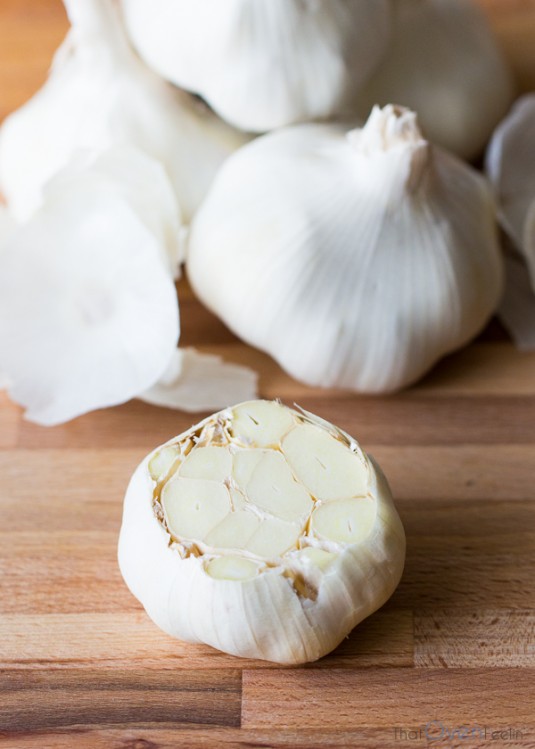
- Slice the top off of each garlic bulb to expose some of the cloves (between ¼ and ½ inch).
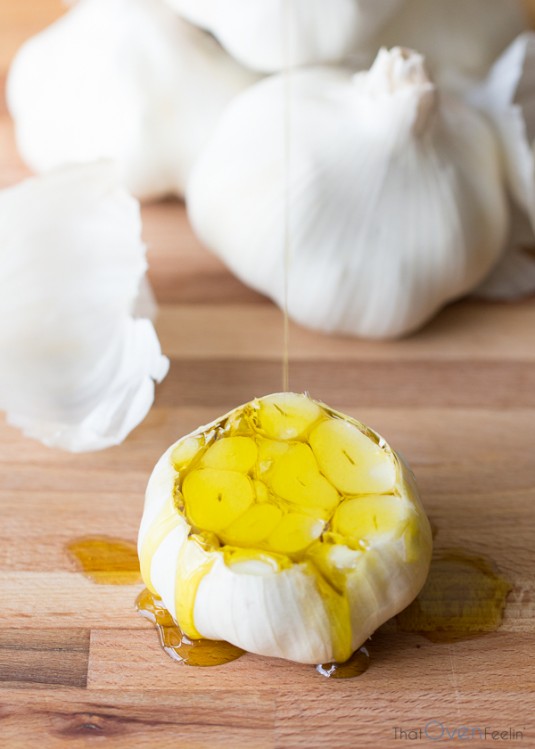
- Place the garlic bulbs on a rimmed baking sheet, cut side up. Drizzle 1-2 teaspoons of olive oil over the garlic bulbs, then season with salt and pepper.
- Cover the rimmed baking sheet with aluminum foil and bake in the preheated oven for 40 to 60 minutes, depending on the size of the garlic bulbs. The center garlic cloves should be easily pierced with a toothpick and golden brown when done.
- Allow the garlic bulbs to cool before squeezing the cloves out. Use a small spoon or paring knife if some of the cloves are difficult to remove.
Freezing the Roasted Garlic:
- If you are freezing whole cloves of garlic, spread the cloves out over a baking sheet and place into the freezer. Once the cloves are frozen, transfer them to a zip-top bag and place back into the freezer until ready for use.
- Alternatively, you can mash the garlic using a fork and freeze in an ice cube tray. Once frozen, pop the cubes of garlic out in to a zip-top bag or container and place back into the freezer.